Windows Install
Installing Windows
So, let’s say your PC got a virus, or some files got corrupted, or you bought a new PC and you want to perform a clean install of Windows 11, or downgrade an existing install of Windows 11 to Windows 10, etc. These are all reasons you might need to install Windows, and this guide will teach you how.
Step 1: Acquire a Windows ISO file and burn it to a USB Drive or a DVD
The best way to do this is to use the Media Creation Tool, which you can get here (direct download link).
The Media Creation Tool will have the option to burn the files to a DVD/USB, but you can also use it to create an ISO file, which you can save for future use.
If you decide to keep an ISO file, you will need to use a 3rd party tool to burn it to a USB/DVD for installation. I recommend Rufus for Windows or Etcher for Linux.
Rufus Instructions

To use Rufus, insert your USB stick or DVD into a fully functioning PC. (If you are installing Windows as first time setup, or to fix a corrupted install, then obviously don’t use the pc that you are repairing with this Windows install.) Then select your install medium (USB/DVD) in Rufus, select your ISO file, then generally you can just hit Start, the follow the prompts. Note that this will wipe your install medium. When it is done, you should have a Windows 10 install medium that you can use many times throughout the future!
Etcher Instructions

Using Etcher is very similar to Rufus. Insert install medium, select ISO file, select install medium as target, hit the Start button.
Step 2: Install Process
System Setup
Very Important Make sure that the drive (HDD/SSD) that you wish to install windows onto is the ONLY drive in the system/PC. I have had things go wrong and stuff install in the wrong place before. To allieviate this, only have one drive physically plugged in (aside from the installation media of course.)
Otherwise, there really isn’t that much setup needed.
Installing
Insert the installation media, and turn on your PC. It should boot directly to the Installation Media, unless there is a pre-existing Operating System on the drive you are installing to. Consult your motherboard’s manual for the keyboard shortcut to enter the boot menu if needed.
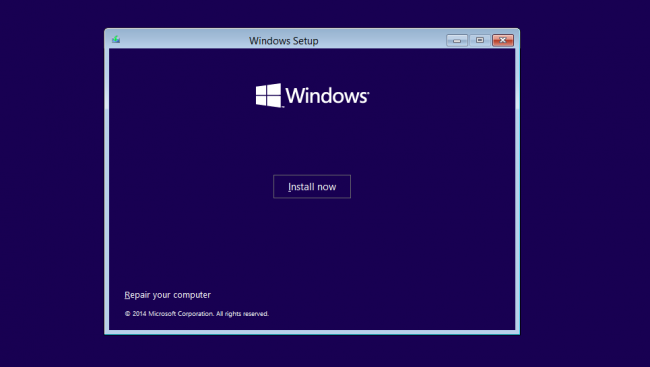
When you get to this screen, you are in the right place.

From there, simply follow the on-screen instructions, if you don’t have a license key, or you are reinstalling, click “I don’t have a license key” (you can activate Windows later), and continue, making sure to choose the “Custom install” option, then select your disk, and hit next.
Once the installation is complete, your PC should reboot. At this point, you should remove the installation media.
Post-Installation
After your PC reboots, follow the prompts, login with your Microsoft account, and that should be about everything! Once this is done, you can re-connect any other drives you may have had, install your programs, activate Windows if needed, and customize everything to your liking!
Final Thoughts
I hope this guide was informative and useful! Installing Windows can seem scary or difficult, but it really isn’t too hard. Thanks for checking this guide out!
Installing Linux
In the future I will make guides for installing Linux, with all it’s many complexities. This page iwll be updated at that point.